Order Confirmation
Note: This article discusses Order Confirmation, which is the process of confirming everything is correct before it is invoiced. This is different from Schedule Confirmation, which is the process of making orders visible on the driver's app or other integrations. For more information on confirming orders on a schedule, see Schedule Confirmation.
The confirmation process ensures that the rates and surcharges are correct before the order is finalized. Once confirmed, an order is locked from further edits to prevent any data changes.
An order must be completed before it can be confirmed. Once an order is complete, it is ready for confirmation. For most users, this happens automatically through the driver's app, which is the preferred method for ensuring accurate and timely data. However, if a order is not completed via the app, it must be manually completed in the system.
How to Manually Complete an Order (if not using the Driver's App)
To find and manually complete orders that were not finished via the driver's app:
- From the main menu, navigate to Orders > Order Search.
- On the search screen, untick all status boxes except "New" and "Allocated."
- This will provide a list of orders that are not yet complete.
- To complete orders one at a time:
- Click into the specific order you need to complete.
- Click the Complete button located in the bottom right corner of the screen.
- To complete multiple orders:
- Press
Mto toggle multi-select, select which orders you want to complete, and then click Complete. To learn more about multi-select in order search, see our article about Order Search Overview.
- Press
Finding Orders for Confirmation
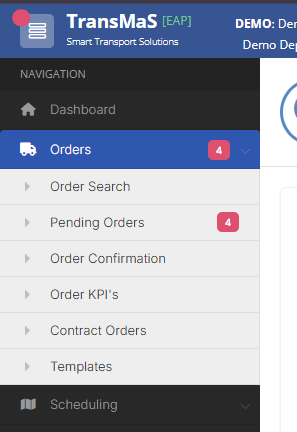
- From the main menu, navigate to Orders > Order Confirmation.
-
Note: If the 'Orders' menu is not visible, click the hamburger (☰) icon in the top-left corner of the screen to expand the main menu.
-
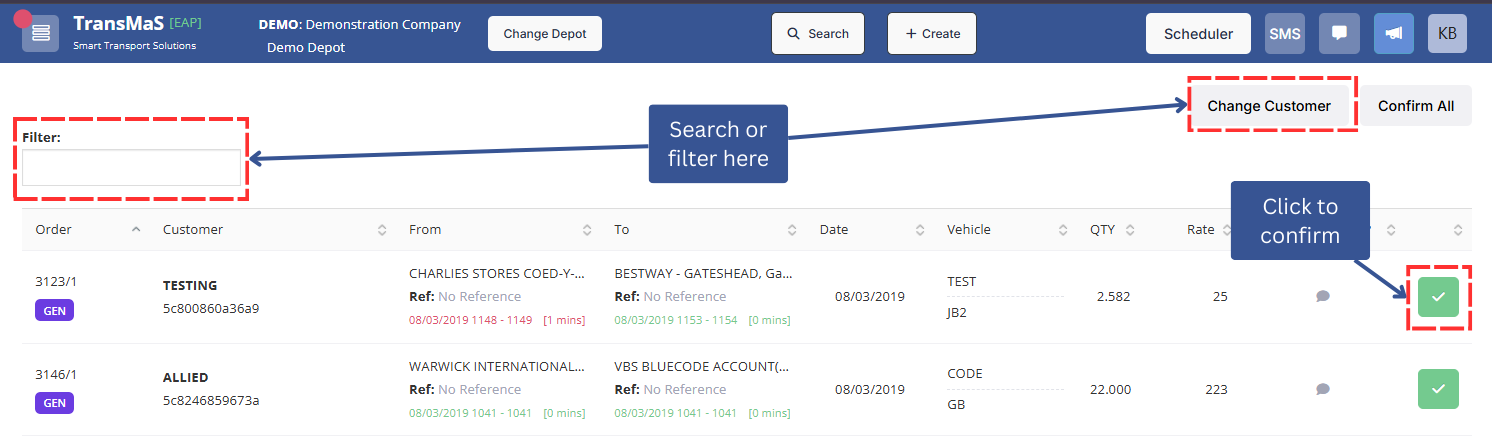
- On the Order Confirmation screen, you can search and filter the list of orders using two fields:
- Free Type Box: Use this box to search for any key field, such as an order number, customer name, or reference number.
- Change Customer: Use this button to select a specific customer or apply filters such as:
- Show only with POD
- Show only without POD
- Include only rated orders
- Include only zero-rated orders
-
The screen will display a list of orders that are in the "complete" status but have not yet been confirmed.


Right-Hand Icons Explained
On the right side of the list of orders, you may see icons that provide quick access to additional information:
-
Notes: This icon indicates that there are notes attached to the order. Grey = internal order notes; red = collection notes; green = delivery notes

-
Surcharges: This icon shows that surcharges have been added to the order.

-
Documents: This icon signifies that documents are associated with the order. Red = ePOD generated by the system; green = a scanned document.


Editing Orders before Confirmation
The Order Confirmation screen allows you to make quick edits to an order without opening it fully:
- Click directly on the Quantity to change the quantity for that item.
- Click directly on the Rate to adjust the rate.
- If an order needs any other changes made, click into it to make any updates needed, then click Update.
Confirming the Order
- To confirm an order, click the green check button next to it.
- You can also confirm from within an order by click the red Confirm button that appears in each Consignment tab.
- After clicking the check button, the order will be removed from your screen and is now locked and ready for invoicing.
Next Steps
Once an order has been confirmed, it is ready to be invoiced. For detailed instructions on how to invoice an order, see the Invoicing Process.