Managing Sites
Sites represent your physical warehouse or depot locations. Every order and zone is associated with a site, so this is the first thing you should set up.
Viewing Your Sites
- Go to Settings → Sites under Stores Settings.
- You'll see a list of all your sites. Use the filter tabs at the top to switch between Active and Archived sites.
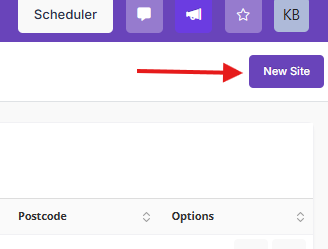
Creating a New Site
-
Click the New Site button.
- A form will appear with the following fields:
- Name (required) — A friendly name for the site, e.g. "Manchester Warehouse".
- Address — The physical address of the site, including street, city, postcode, and country.
- Linked Location (optional) — If this site corresponds to a location already set up in the main TMS, you can link it here. Start typing to search.
- Default Printer (optional) — If you've connected PrintNode, you can choose a default label printer for this site. Any labels printed at this site will use this printer unless overridden.
- Click Save to create the site.

Editing a Site
- Click on a site in the list to open it.
- Make your changes and click Save.
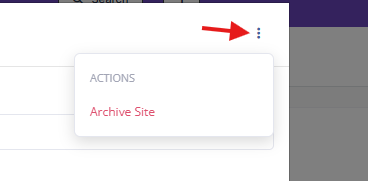
Archiving a Site
If a site is no longer in use, you can archive it rather than deleting it. This keeps historical data intact.
- Open the site you want to archive.
- Click the three-dot menu (⋮) in the top-right of the form.
-
Select Archive and confirm.

Archived sites won't appear in dropdown lists when creating orders or zones, but you can still view them by switching to the Archived tab. If you need to bring a site back, simply open it and save it again — this will restore it to active status.
Tips
- Set up your PrintNode connection before creating sites if you want to assign default printers straight away.
- Linking a site to a TMS location is optional but useful if you want to connect warehouse operations to your transport planning.