Working with Rate Tables
Rate tables allow you to automate your order pricing so you don't have to manually enter the rate on each job.
By taking advantage of a rate table it removes data entry and miskeys and means the days of zero rated orders can be left behind.
Currently requires administrator permission to access
Viewing Rate Tables
To view any existing rate tables you can do the following:
- Select Settings from the menu
- Click Rate tables in the Order Settings section
- Click the eye symbol next to the relevant table
Creating a Rate Table
To create a new rate table:
- Select Settings from the menu
- Click Rate Tables in the Order Settings section
- Click Create New Rate Table at the top right
- Begin by entering your Root Field - this is the field you want us to begin rating by and will be filtered first
- Enter a Table Name that you would like this rate table to be known by
- Select the relevant Rate Type as CPT or Trip rate, this will apply to all rates in the table.
- In the table beneath you need to enter an Operator, Criteria and Rate (see examples below)
- The Rate will be the default rate matching that criteria if no sub-filter matches
- To then add further details, press the blue button to add a sub-filter
- Select the source as Create Custom Entries or use existing rate table to inherit from another
- Select a field for the 2nd level
- Again, enter an Operator, Criteria and Rate to set the default rate matching that filter
- At this point you can choose to add an additional level if required by clicking the blue button
- Or you can click the green plus button to add another sub-filter option.
- Once completed, click the Create Rate Table button to save your details.
Examples
-
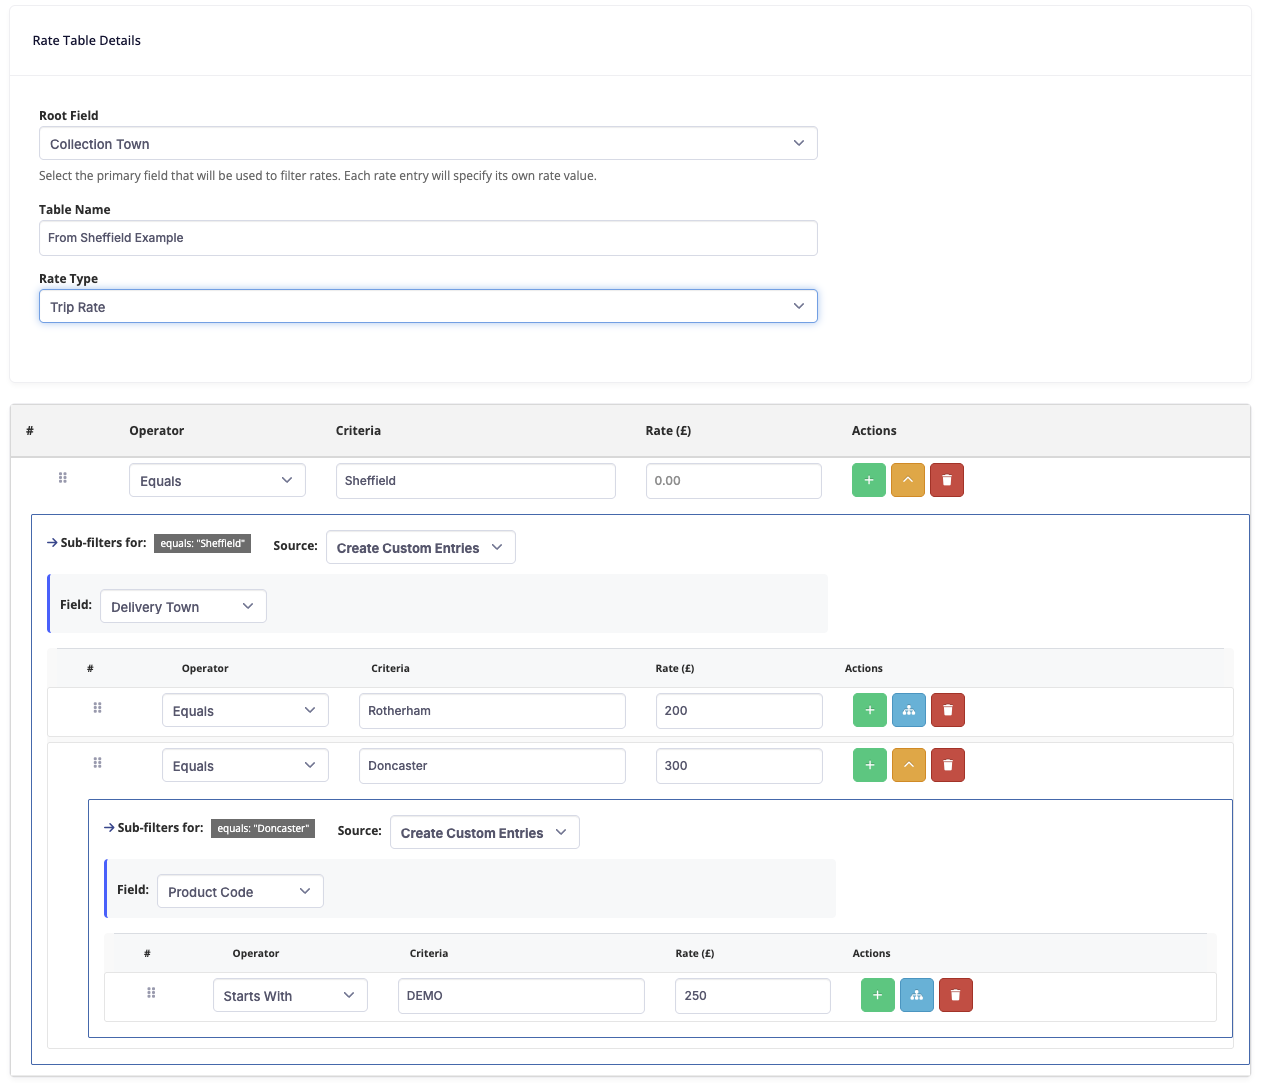
You carry out all of your work from Sheffield to various locations in South Yorkshire. You would select your Root Field as Collection Town, and as your first rule set it to Equals, Sheffield with a standard rate of £0 (prevents rates for unknown locations)
Add a sub-filter with field of Delivery Town, and then in the operator select Equals, Rotherham with a rate of £200. This will then tell the system, any jobs from Sheffield - Rotherham are £200.
Add an additional line, with a Criteria of Doncaster, and rate of £300. This will again tell the system if you are going to Doncaster it should be a different rate.
Imagine your rates to Doncaster depend on what product you are carrying, clicking the blue button will create an additional filter for you to then select the Field as Product code, where you can continue as above. Unless the product is listed, it will charge at £300.

-
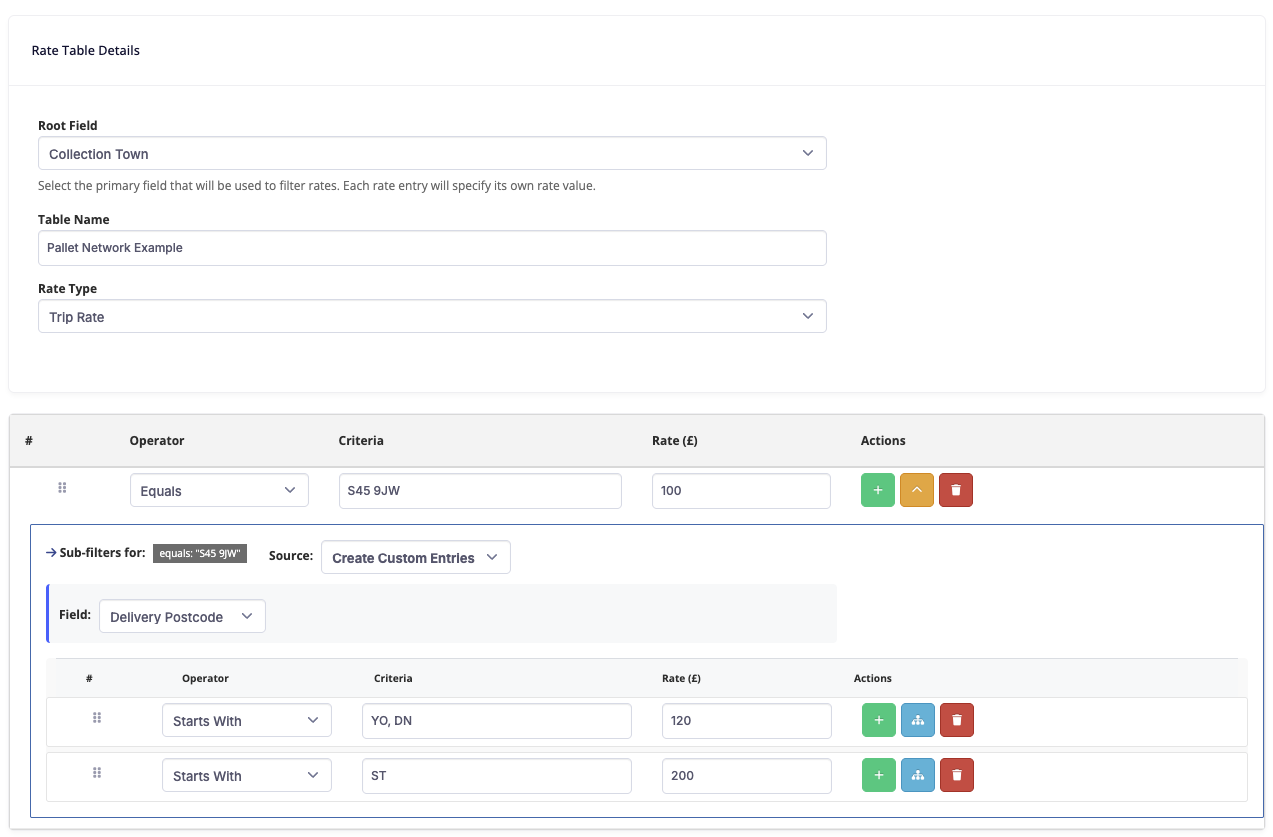
You work for a pallet network, and all rates are set in zones by postcode. Begin by setting the root Field as Collection Postcode. Again set the Operator to Equals, and set the Criteria to your postcode, in this example we will use S45 9JW. Set the rate for zone 1 pricing.
For additional zones, click the blue button, and then select the field as delivery postcode. Set the operate as Starts with and then you can enter the Postcodes of each area, entering multiple postcodes separated by a comma will create an "OR" filter.

Activate a rate table
- Open the customer's profile (Settings > Customers under Order Settings.)
- Open the Configuration tab
-
Select which rate table you want to apply in the Rate Table drop down.
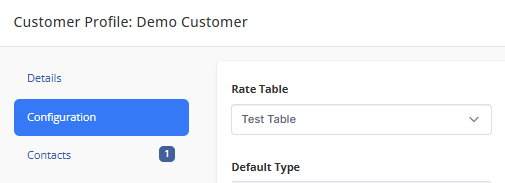
- Click Update.

The system will then automatically set the rate when creating a new order. You can tell when a rate table has been applied by the notation under the rate type on the order create form.
