The Scheduler Screen
Understanding the scheduler screen
The scheduler screen can be accessed either via the button on right in the TransMaS header bar on every screen, or from within the sidebar menu.
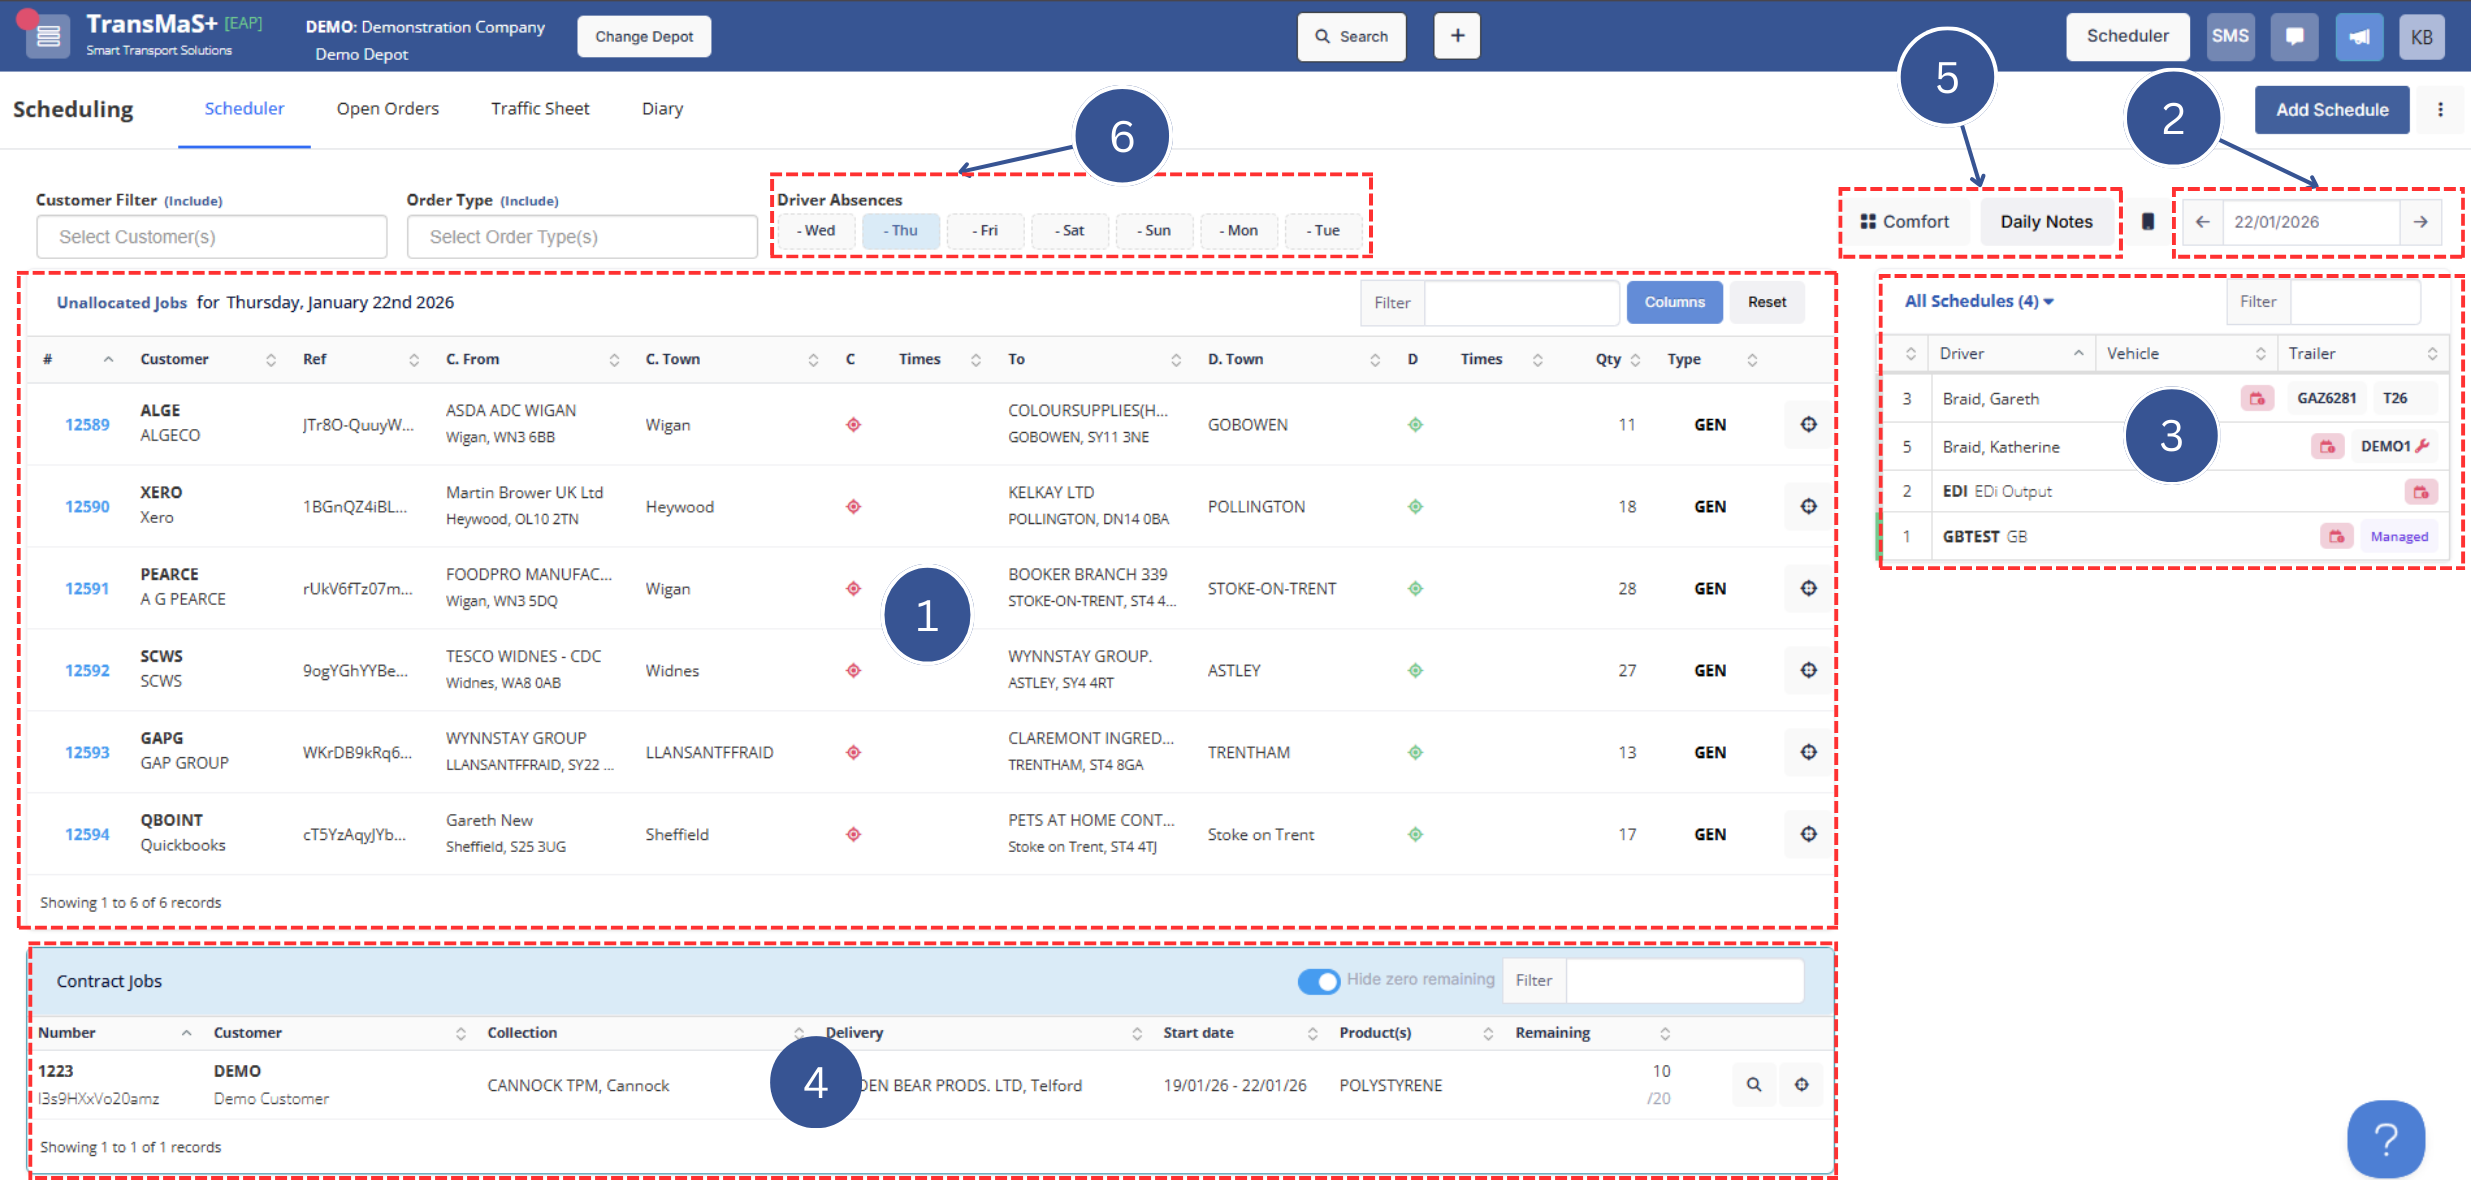
- Unallocated Orders - The unallocated orders part of the screen shows a listing of all unallocated orders for the day. It can also be toggled to show available drivers, vehicles, or trailers.
- Date Picker - You can use the arrows to go forward or back a day or click in the box to pick a date.
- Schedules Panel - The schedules panel shows list of vehicle/driver pairings available for work that day (we call this a “schedule”).
- Contract/Bulk Orders - Any unfilled or partially unfilled contract orders can be seen in the lower half of the scheduler screen.
- Daily Notes & View Toggle - Daily Notes opens a notepad for any daily notes you might want to take. These notes will show as a banner across the top of the Unallocated Orders. The Comfort/Compact view toggle switches between an expanded or compact view of orders.
- Driver Absences - This summarizes how many drivers have an absence scheduled for the day; hover over for details.
Unallocated Orders
The list of orders here are populated by orders either created manually or accepted from the pending orders screen. Right click on any order line to copy or cancel the order.
You have several options for filtering and adjusting your view.
-
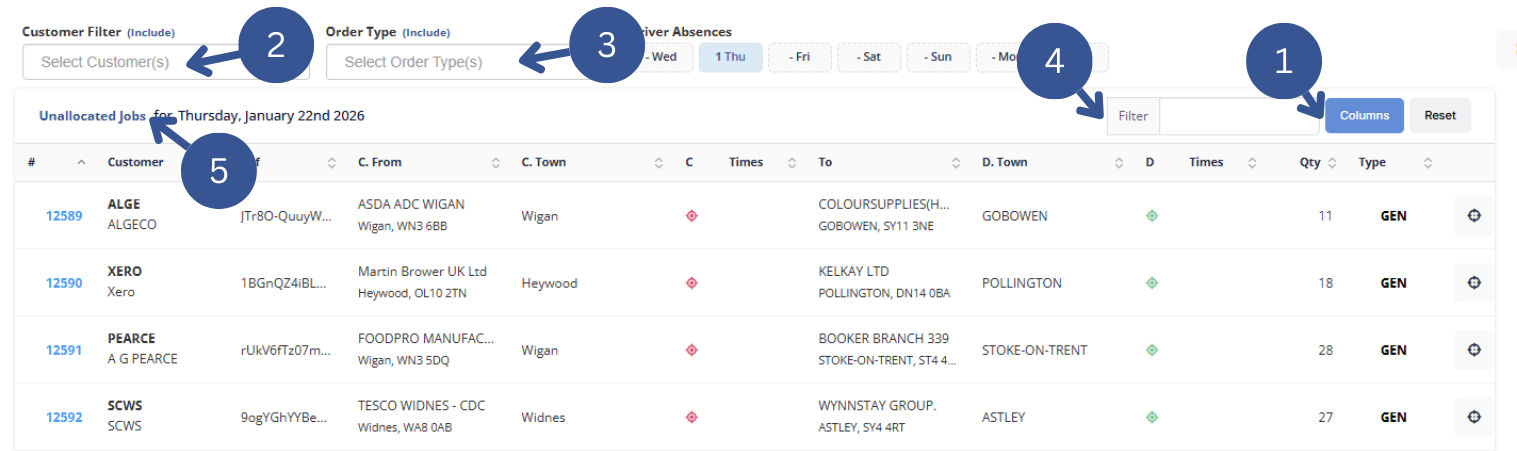
Column Selection
Job number and dragging handles will always be shown. Other columns can be set by user; which columns you select won't affect others. The default columns are Customer, Reference, Collection From, Collection Date, Delivery Site, Delivery Date, Quantity, and Order Type.
Other columns you can select from include Collection Reference, Collection Town, Collection Postcode, Delivery Reference, Delivery Town, Delivery Postcode, Rate, Collection Comments, Delivery Comments, Service Level, Products (Code), Duration, Container, Keywords, and Products (Name).
-
Customer Filter
If you only want to work with orders from a specific customer(s), you can filter them here. If you click in the box it will show a drop down of customer codes that have orders for the selected day. Or you can start typing and press enter when the one you want is displayed. You can filter by multiple customers at a time.
The filter defaults to include (show only) the customers you're filtering; if you instead want to show all except the ones you're filter, click to toggled to exclude.
-
Order Type
The order type filter works the same as the customer filter and will show a drop down of order types when you click in the box.
- General Filter - This will filter by any information in the columns, including hidden columns.
-
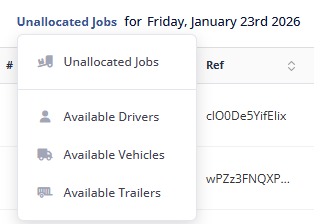
Drop-down to select whether unallocated orders or available drivers, vehicles, or trailers are shown.

Working with Available Resources (Drivers, Vehicles, & Trailers)
To switch between viewing orders and available resources, use the Resource Drop-down located at the top of the Unallocated Orders panel, as shown above. By default, this is set to Unallocated Orders, but you can select Drivers, Vehicles, or Trailers.
The Available Drivers view displays all drivers who do not currently have work assigned for the day.

- Scheduling: Drag a driver from this list onto the Schedule Panel.
- Drag to the top area to create a brand-new schedule.
- Drag onto an existing driver to replace them in that specific schedule. (Cannot be dragged onto a driver who has already started work.)
- Status Indicators:
- Grey: No schedule created; driver is not marked as available or unavailable on the roster.
- Blue: Driver has a schedule created, but no work has been assigned yet.
- Yellow: Driver is marked as "Available" on the roster but does not yet have a schedule.
The Available Vehicles view shows all vehicles currently without allocated work.

- Assigning a Vehicle: Drag a vehicle onto a driver in the Schedules Panel.
- Before work starts: You will be asked if you want to change the driver's Main Vehicle or add a Pickup Instruction.
- After work starts: You will only be prompted to add a Pickup Instruction.
- Status Indicators:
- Red: Vehicle is not assigned to any schedule.
- Yellow: Vehicle is assigned to a schedule but has no work allocated.
- Black: Vehicle is marked as Off-Road (VOR). Hover over the vehicle for details.
The Available Trailers view displays all unassigned trailers. The functionality for dragging trailers onto the scheduler mirrors the Vehicle process.
- Status Indicators:
- Red: Trailer is available for assignment.
- Black: Trailer is marked as VOR.
Schedules Panel
The Schedules Panel shows all available schedules for the selected day. Right click on a schedule line to view driver, vehicle, or trailer profile; confirm or delete schedule; or to view running sheet. If you need to add drivers to the schedule panel, see more at Schedule Creation.
Bulk orders
Any unfilled contract orders can be seen in the lower half of the scheduler screen. To draw down from a bulk order, click the handle at the end of the row and drag it into the top half of the scheduler or directly onto a schedule.
See more about: Working with Contract Orders
Next Steps
Learn how to schedule work with Planning in the Scheduler or use multi-mode for efficient planning.