Managing Schedules
A schedule (sometimes known as a load) in TransMaS is an driver/vehicle pairing to which work can be assigned. They are most commonly seen on the Scheduler Screen in the Schedules Panel, or on the Open Orders screen at the end of a line of any job that has been allocated. You can see some basic detail on those screens but opening up the schedule detail screen provides you with a wide array of information and options.
How to open an existing schedule
Existing schedules can be opened from a variety of places.
- From the scheduler, in the Schedules Panel, simply click within a schedule line to open the schedule. This will open the schedule regardless of whether any orders have been assigned to it.
- From the Open Orders screen, click on any visible schedule in the Schedule column. If there is no schedule for an order, it will say "Unscheduled" and clicking there will give you the option to Create a schedule.
- From any order detail screen, click on the Completion tab. If the order has been assigned to a schedule, it will say "driver assigned" and there will be a button to View. If it has not, the button will say Assign Driver, and you can click there to schedule the consignment to an existing schedule or create a new one.
- Schedules can also be opened from the Traffic Sheet or Planner Diary, just click into the line where a schedule is.
How to delete a schedule
Deleting a schedule (load) will remove that driver from the schedule for the day. To do this, you can right click on the schedule in the Scheduler Screen, and select cancel. Alternatively, you can select Delete from the bottom left of any Schedule View window.

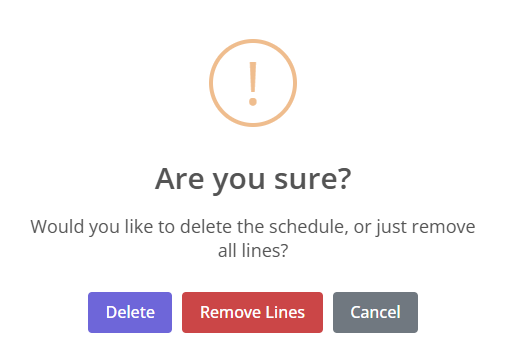
From there you will get a confirmation pop-up asking if you want to remove the schedule or the lines. Delete will remove the driver from the schedule for the day; Remove Lines will leave the driver/vehicle on the schedule but remove all of their assigned work. If their work has already been started, you will be unable to delete the schedule.
How to set a start location
Schedule starts are automatically populated at 2 am of the day of a schedule if one hasn't manually been set. By default, they are set to no specific location and request the driver to confirm the beginning of their shift and to start with any vehicle/trailer that is assigned to them (under Driver Profile > Allocations).


If you wish to have a schedule start with different options, this can be manually set on upcoming days.
-
From within a schedule, click on the orange button that says "Set start location"
- Select which location you want your driver to start from, or click the toggle for No Specific Location. If you do not toggle for no specific location, the instruction will not save unless you have entered a location.
- Set a specific time if desired, or click the toggle for Driver Confirm. If you do not toggle to Driver Confirm, you must set a specific time. Drivers will still need to confirm the beginning of their shift regardless of the toggle.
- Options: Start with vehicle or trailer. This will add the vehicle and/or trailer to the driver's start schedule instruction.
- Confirm line: Un-toggle this to add the Schedule Start instruction without sending it to the driver on the app. It will need to be confirmed before the driver will see it.

How to rearrange job lines
In the schedule detail screen there is a list of jobs assigned to this schedule. At the left of each job line is a handle you can drag to rearrange the order of jobs.

Changing the plan
While you split jobs between collection and delivery in the initial planning, sometimes you need to change the plan after it's made. Managing allocated jobs from the Schedule View is easy: you can change the driver, split the job into collection and delivery legs, or remove the job from the schedule entirely.
Learn more: Managing Allocated Jobs
Using the map overview
You can toggle the map view by clicking the button in the top right corner. Hover over a schedule line to see it highlighted in the map.

Change Day to Night
In the schedule panel there is a toggle for Days or Nights. Typically this is set by the driver's shift pattern, but this toggle is available if you need to change it on the fly. A night shift will show up highlighted in lavender on the Scheduler and Traffic Sheet.
Sending Instructions
You are able to send drivers instructions during the course of their work day. This could be something like a trailer swap, or instructing a driver to take the vehicle for maintenance. TransMaS comes with standard instructions, but you can also set your own.
Learn more: Adding Instructions for Drivers
How to set the owner of a schedule
The owner of a schedule is the TransMaS user responsible for managing it. Schedules can be filtered by owner in scheduling screens including the Scheduler and Traffic Sheet.
Learn how: Setting the owner of schedules